Buy More, Save More: Get up to 20% off on Alcohol Inks!
5 Resin Art Projects to Try This Weekend
Discover how to combine alcohol inks with resin to create dazzling, one-of-a-kind art pieces. We’ll walk you through five easy and fun projects perfect for weekend creativity.
Fedarice Brou
10/24/20244 min read

5 Resin Art Projects to Try This Weekend
Resin art is an incredibly fun and versatile medium that has grown in popularity for its glossy finishes, vibrant colors, and ability to encapsulate various objects. Whether you’re new to resin or an experienced artist looking for fresh ideas, these 5 weekend projects will inspire you to create stunning pieces of art. From functional items to purely decorative art, these resin projects are easy to start and offer endless possibilities.
1. Resin Coasters with Alcohol Ink
Resin coasters are a great beginner-friendly project that allows you to experiment with alcohol inks and pigments. Here’s how to make them:
Materials Needed: Resin (epoxy or UV), alcohol inks, silicone coaster molds, a heat gun, and gloves.
Step-by-Step:
Prepare your resin according to the manufacturer's instructions. Ensure you mix equal parts resin and hardener thoroughly.
Pour a thin layer of resin into the silicone molds and allow it to sit for a few minutes to remove air bubbles.
Add a few drops of alcohol ink in different colors. Use a toothpick or skewer to swirl the ink for a marbled effect.
Lightly use a heat gun to pop any bubbles and to manipulate the ink for unique patterns.
Let the resin cure completely (usually 24-48 hours).
Once hardened, gently remove the coasters from the mold, and you have a beautiful set of customized resin coasters.
This project lets you create functional and decorative pieces while experimenting with color blending and texture.
2. Resin and Wood Charcuterie Board
A resin and wood charcuterie board adds an artistic twist to your kitchen and dining experience. The mix of natural wood grain and vibrant resin makes for a visually stunning serving board.
Materials Needed: Wood serving board, painter’s tape, epoxy resin, pigments, a heat gun, and sanding tools.
Step-by-Step:
Tape off the sections of the wood where you’ll be pouring the resin.
Mix the resin with your chosen pigments. Metallics like gold and copper work beautifully with natural wood.
Pour the resin into the taped-off sections. You can create rivers of resin by tilting the board or layering colors for a gradient effect.
Use the heat gun to remove bubbles and blend pigments.
Let it cure completely. After curing, remove the tape and sand down any rough edges.
Finish with a food-safe topcoat if you plan to use the board for serving food.
This project is perfect for gifting or upgrading your home décor.
3. Resin Jewelry
Resin jewelry is another fantastic way to explore the medium. You can embed small objects, like dried flowers or glitter, to create one-of-a-kind earrings, pendants, or bracelets.
Materials Needed: Resin, jewelry molds or bezels, small decorative elements (flowers, glitter, beads), jewelry findings, and a UV light (if using UV resin).
Step-by-Step:
Mix the resin and pour it halfway into the mold or bezel.
Add your decorative items, carefully placing them in the resin. Dried flowers, gemstones, or metallic flakes work beautifully.
Fill the rest of the mold with resin, ensuring the objects are fully submerged.
Use a UV light to cure the resin if using UV resin, or let it cure naturally if using epoxy resin.
Once fully cured, attach the jewelry findings to create earrings, necklaces, or bracelets.
Resin jewelry is a quick, creative weekend project that allows you to create personalized accessories.
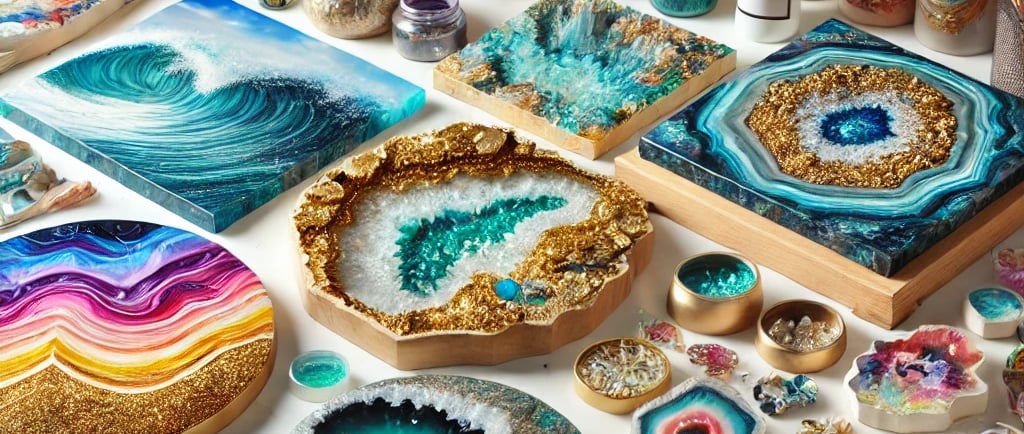
4. Resin Geode Wall Art
If you’re looking to create a statement piece, resin geode wall art is the perfect project. This project involves creating abstract geode designs with layers of resin, glitter, and crystals.
Materials Needed: Canvas or wood board, resin, crystals, glitter, pigments, and a heat gun.
Step-by-Step:
Begin by sketching a rough outline of your geode pattern on the canvas or wood.
Mix resin with different pigments—choose shades of blues, purples, or metallics for an authentic geode look.
Pour the resin in layers, following your sketched design. Use glitter and crystals to accentuate different parts of the “geode.”
Blend the resin using a heat gun, creating a marbled, flowing effect that mimics natural geodes.
Let each layer cure before adding the next to achieve depth and dimension.
Once all layers are set, your stunning resin geode is ready to hang.
This project is ideal for anyone wanting to create a large, decorative piece that mimics nature’s beauty.
5. Resin Keychains
Resin keychains are fun, quick, and make great personalized gifts. You can add small objects, letters, or glitter to make each keychain unique.
Materials Needed: Resin, silicone keychain molds, key rings, glitter, alphabet letters, small decorative items.
Step-by-Step:
Pour mixed resin into keychain molds, filling them halfway.
Add your decorative elements—glitter, small beads, or tiny letters.
Fill the rest of the mold with resin and allow it to cure.
Once cured, attach the key ring through the hole in the mold.
Sand any rough edges and enjoy your new custom keychain!
This is a quick project that’s perfect for weekend crafting or small personalized gifts.
Conclusion
Resin art is an incredible medium that opens up a world of possibilities for creative expression. These five weekend projects offer a range of difficulty levels, from simple coasters to elaborate geode wall art, and allow you to create both functional and decorative pieces. Whether you’re new to resin or looking to explore new projects, these ideas will help you get started and experiment with the versatility of resin.