Buy More, Save More: Get up to 20% off on Alcohol Inks!
Mastering Alcohol Ink Techniques: A Beginner’s Guide
Learn the basics of working with alcohol inks, from color blending to creating beautiful abstract pieces. Whether you’re just starting out or looking to refine your skills, this guide has everything you need to create stunning artwork.
Fedarice Brou
9/26/20244 min read
Mastering Alcohol Ink Techniques: A Beginner’s Guide
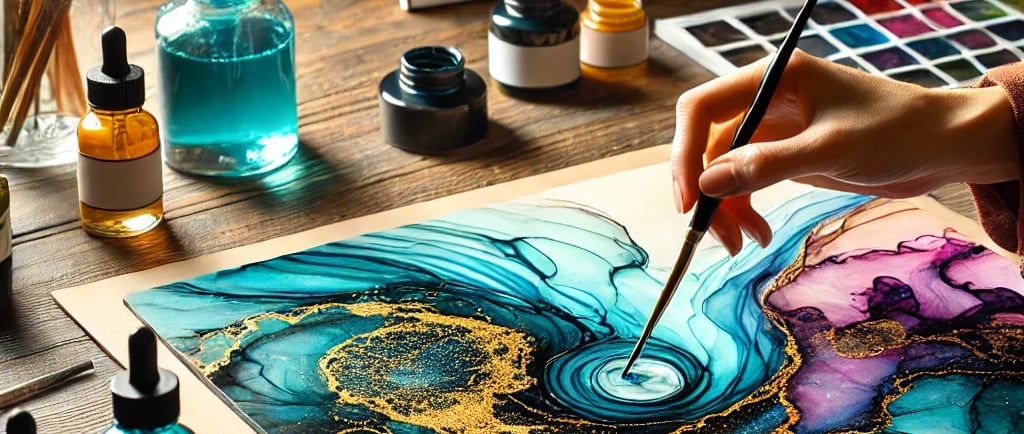
Alcohol ink is a fascinating, vibrant, and highly versatile medium that has captivated artists of all levels. Known for its fluid movement, bold colors, and the ability to create stunning abstract designs, alcohol ink allows for a unique artistic experience. As a beginner, you may find the process both exciting and challenging due to its unpredictability, but with the right techniques and tools, you can quickly gain control and produce beautiful artwork. In this guide, we’ll walk you through everything you need to know to start mastering alcohol ink.
What is Alcohol Ink?
Alcohol ink is a dye-based ink that is alcohol-soluble. Its quick-drying nature makes it ideal for creating layered and detailed artwork. The ink works best on non-porous surfaces, allowing it to spread, mix, and move in captivating ways. The colors are incredibly vibrant, giving your artwork a depth and brilliance that is hard to achieve with other mediums.
This medium is particularly popular in abstract art, mixed media, and resin art. Since the ink is dye-based, its translucency allows for incredible blending and layering effects. However, alcohol ink dries rapidly, requiring artists to work swiftly and precisely. But don’t worry—this guide will help you build confidence and skills for working with this dynamic medium.
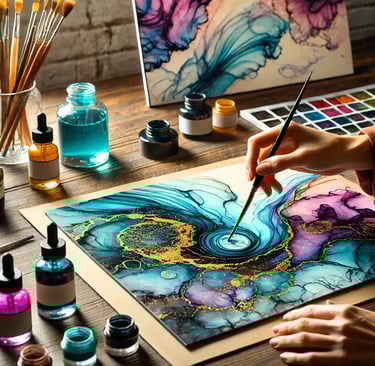
Essential Tools for Alcohol Ink Art
Before you begin, it’s important to gather the right supplies. Here’s a breakdown of what you’ll need:
Alcohol Ink: For beginners, start with a range of colors to explore different effects. Abba Pappa Crafts offers an 8 Colors + Supplies Bundle, which includes essential tools such as alcohol ink paper and a blending solution. Our 12 Colors + Blending Solution Kit is perfect for those looking to explore more vibrant hues.
Blending Solution: This is essential for lightening colors, removing ink from your surface, or creating blending effects between layers. It’s a critical tool for mastering alcohol ink control.
Non-Porous Surface: Alcohol ink works best on non-porous surfaces like Yupo paper, tiles, glass, metal, or acrylic. Yupo paper is synthetic and waterproof, allowing the ink to flow freely without being absorbed, which helps maintain its vibrant color.
Tools: You’ll need tools such as pipettes, palette trays, and an alcohol ink blower. A blower or straw helps you manipulate the ink as it moves across the surface, giving you control over the fluidity. Brushes and sponges are also great for detailing and texture.
Protective Gear: Alcohol ink can stain hands and surfaces, so it’s a good idea to use gloves and cover your workspace with a protective sheet. Ensure good ventilation, as the alcohol can emit fumes.
Foundational Alcohol Ink Techniques
Here are the key techniques that every beginner should practice to gain confidence in working with alcohol ink:
1. Dropping and Blending
One of the simplest and most enjoyable ways to start using alcohol ink is by applying drops of ink directly onto your non-porous surface. You can drop multiple colors next to each other and observe how they interact. To control the blending process, use a blending solution. Applying a few drops of blending solution to the ink will cause it to spread and lighten, allowing colors to blend smoothly or fade into subtle gradients.
Pro Tip: Experiment by tilting the paper or blowing air onto the ink to see how the colors move.
2. Air Manipulation
Using an alcohol ink blower (or a simple straw), gently blow on the ink to manipulate it into different shapes and patterns. This technique is perfect for creating soft, organic designs such as petals, waves, or abstract shapes. By directing the air, you can create elegant feathering effects, allowing for a greater sense of control while maintaining the ink’s fluid nature.
For more advanced results, try adding layers of ink and moving them with controlled bursts of air. This method allows you to create intricate designs that change based on the intensity and direction of the air flow.
3. Layering Colors
Layering is one of the most powerful aspects of working with alcohol ink. Begin with a base layer of ink, letting it dry fully before adding more colors on top. Alcohol ink is transparent, so layering multiple colors adds depth and richness to your artwork. Each new layer reacts differently, providing a beautiful range of effects from subtle blending to striking contrasts.
To create highlights or negative space, use a cotton swab dipped in blending solution to lift the ink from specific areas, revealing the lighter layers beneath.
4. Using Alcohol Ink with Brushes
While alcohol ink is known for its fluidity, you can also use brushes for more detailed work. Dip a brush into the ink or blending solution and paint fine lines or add intricate details to your design. This technique is ideal for artists who want to combine the loose, abstract quality of alcohol ink with more controlled and precise elements.
Tips and Tricks for Beginners
Here are a few expert tips to help you get the most out of your alcohol ink experience:
Work Quickly: Alcohol ink dries fast, so you’ll need to work quickly to achieve your desired effect. Once dry, the ink is set and can’t be easily altered without using blending solution.
Experiment with Color Combinations: One of the most exciting aspects of alcohol ink is the ability to mix and match colors. Some of the best designs come from experimenting with unexpected color pairings, so don’t be afraid to play around with different combinations.
Control the Intensity: If you find a color too bold, use the blending solution to soften or lighten it. Conversely, add more ink to intensify the vibrancy.
Use Tools Wisely: Tools like pipettes and blowers give you greater control over how the ink moves. Practice using these to direct the flow and create more intricate designs.
Protect Your Surface: Since alcohol ink can stain, always work on a covered surface, and wear gloves to avoid accidental messes.
Final Thoughts
Mastering alcohol ink is a rewarding journey that opens up endless possibilities for creativity. With its flowing, unpredictable nature, it offers artists the chance to experiment, play, and explore new techniques with every project. Whether you’re creating abstract works, resin art, or adding vibrant touches to mixed media pieces, alcohol ink is an excellent medium to express your artistic vision.
At Abba Pappa Crafts, we’re passionate about helping artists at every level unlock their potential. Our beginner-friendly kits and bundles are designed to make it easy for you to dive into the world of alcohol ink with all the tools and resources you need to succeed. Explore our 8 Colors + Supplies Bundle or our 12 Colors + Blending Solution Kit to get started, and let your creativity flow!